SalesForce Marketing Cloud - Using Content Builder
The SalesForce Marketing Cloud has two different methods for creating content; Classic Content and Content Builder. Whether you were originally trained using the Classic Content or are new to Content Builder, please go through the following steps.
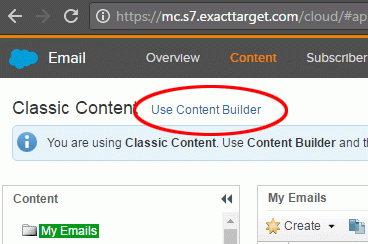
Under Content switch over to Content Builder by clicking on Use Content Builder.
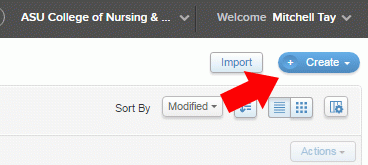
Once switched over to Content Builder, click on Create near the top right corner. A drop down menu will appear, click Email.
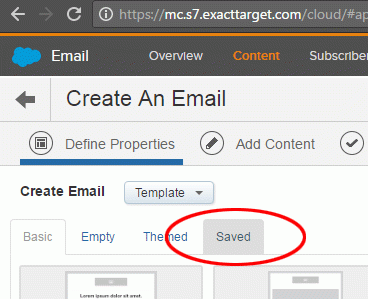
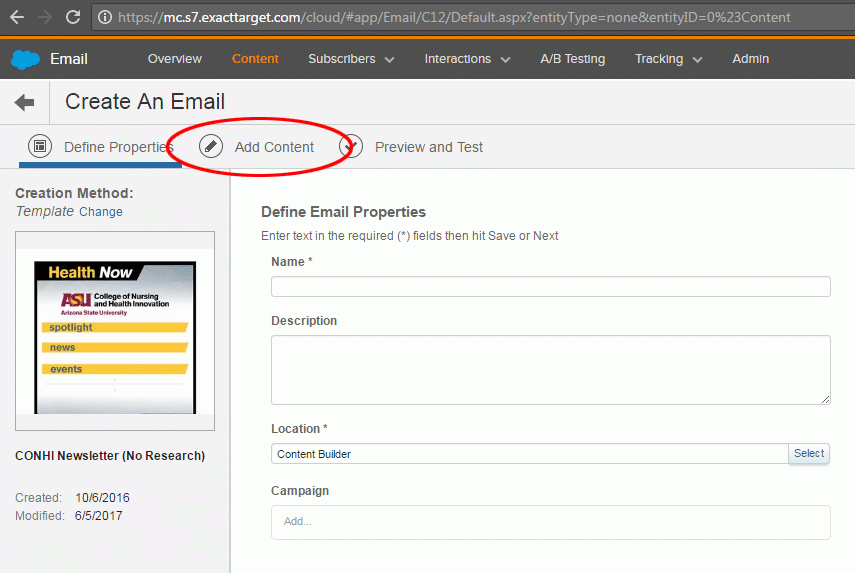
Click on the Saved tab if not already on that section. Choose the appropriate custom CONHI email template then click on Select on the bottom right.
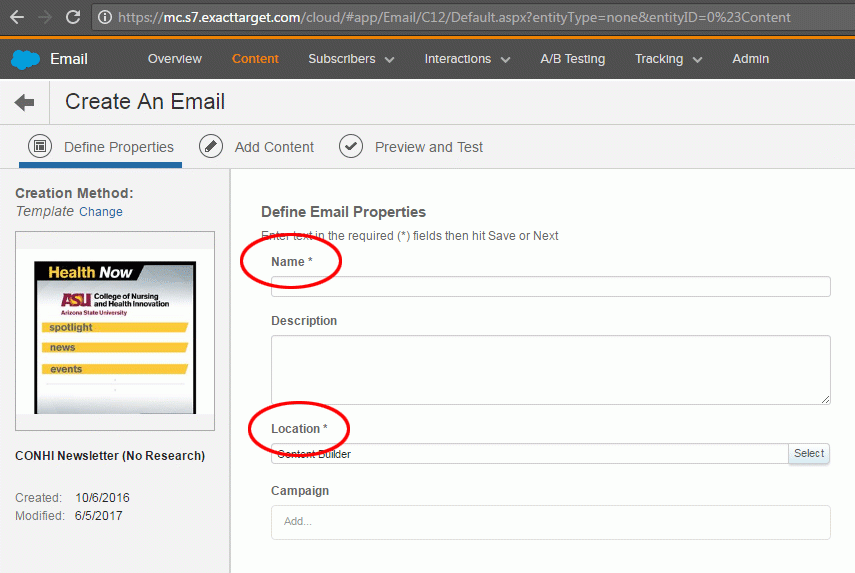
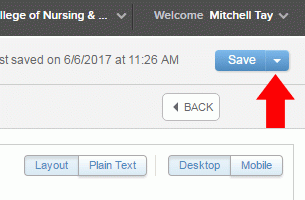
Enter the Name of your email. This is not your subject line. Use this as your method of archiving. For example: 20170101 Weekly Newsletter - (YYYYMMDD Email Type). Select the location where you will like your email to be. Recommendation: store within Emails folder. Click Save on near the top right if it doesn't auto-save.
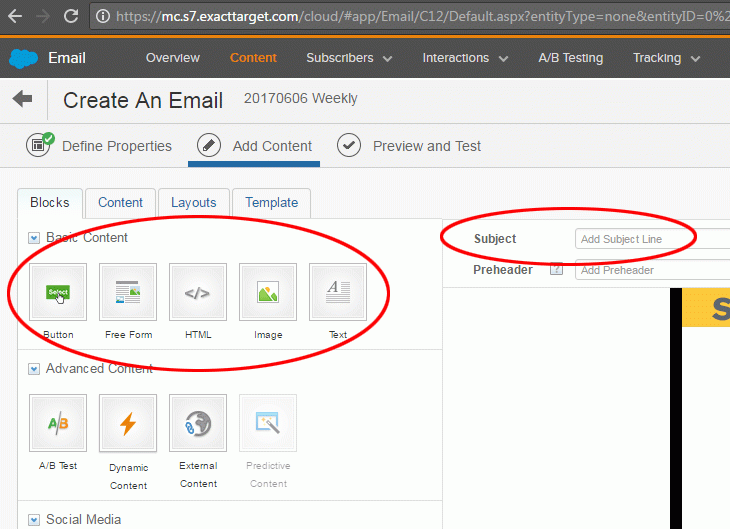
Click on Add Content to proceed.
Create a Subject Line. Drag and Drop the Blocks on the lefthand side into regions of the email and begin adding your content.
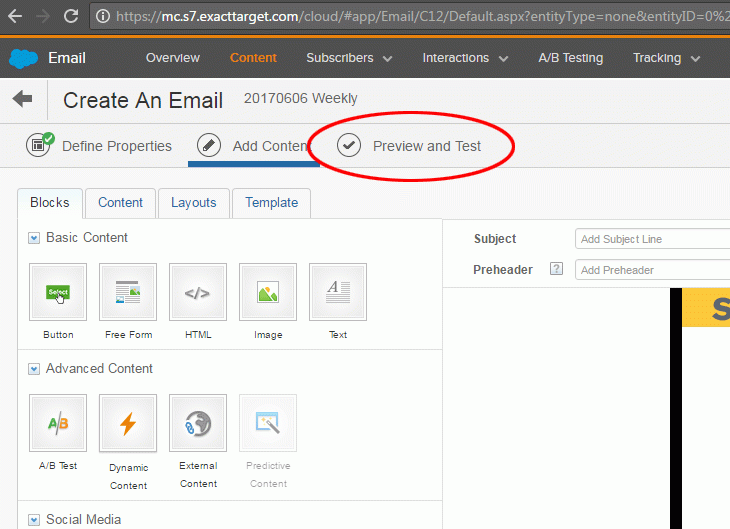
Once you are finished it is highly recommended to preview your email send. Click on Preview and Test.
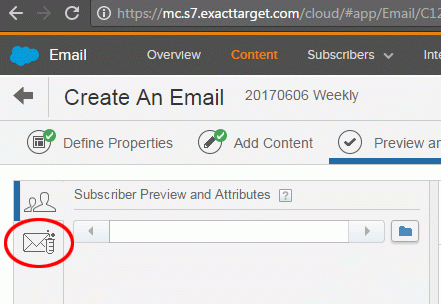
Click on the envelop and test tube icon to view your test send settings. Ensure that the appropriate recipients to receive the test email. Click Send Test at the bottom of the options.
Once your email has been previewed and tested you are ready to send. On the top right corner, click the down arrow button on Save. A drop down menu will appear, click Send and Save.
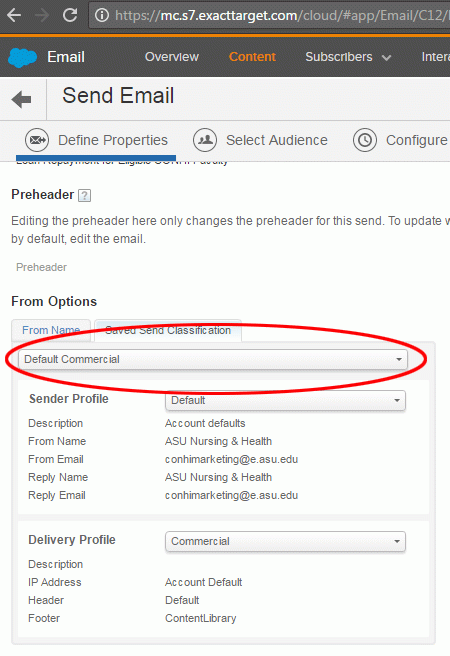
In the From Options section, you may leave the default setting of Default Classication. If the subscription list is 100% CONHI employees, please select the Default Transactional. Click Next on the top right-hand side once finished.
Choose your audience list by first selecting the folder in which your subscriber list is under in Section A. Most common is under the default My List or Shared Data Extensions. Drag and drop your email list from Section B to Section C where it indicates Targeted. Click Next once completed.

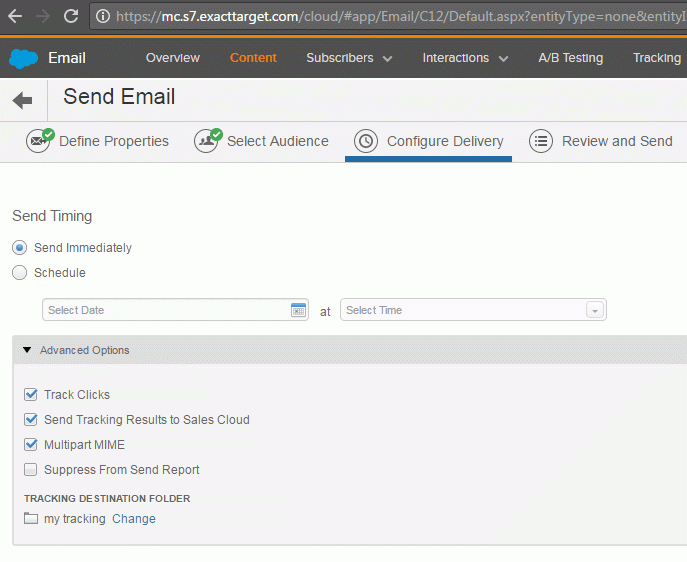
Configure your delivery on when you want to send the email. We strongly recommend scheduling emails should there be any last minute changes.
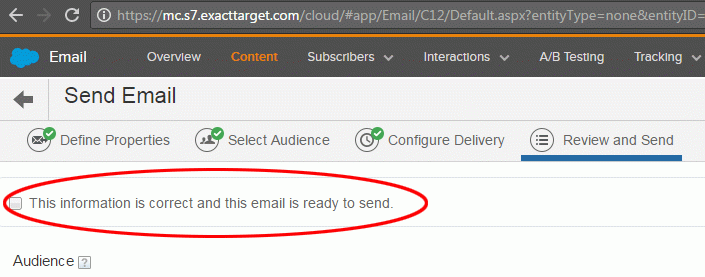
Review all your information in this last step. Once everything is approved, click on the checkbox indicating the the information is correct and ready to send. The Schedule button will then be enabled on the top right-hand side when ready.
You're all set!